
Keurig 2.0 Manual: Troubleshooting and Maintenance Guide
This comprehensive guide provides essential troubleshooting and maintenance tips for your Keurig 2.0 brewing system. Learn to diagnose and resolve common issues, ensuring optimal performance and longevity. From cleaning needles to addressing error messages, find solutions to keep your Keurig 2.0 running smoothly for years.
Common Problems with Keurig 2.0 Brewers
Keurig 2.0 brewers, while offering convenience, can encounter several common issues. One frequent problem is the brewer failing to power on, potentially due to power surges or electrical issues. Another is the brewer not brewing, often linked to air bubbles or debris in the internal tubing. Water pressure issues can also arise, sometimes indicated by an error message. Leaking water is another common concern, potentially caused by a misaligned water reservoir or a full drip tray.
A particularly frustrating issue is when the Keurig 2.0 won’t read K-Cups, preventing brewing. This can be due to sensor problems or incorrect K-Cup placement. Clogged needles, both entrance and exit, are also frequent culprits behind brewing problems.
Furthermore, the machine may stop pumping water or overfill, indicating a potential issue with the internal mechanisms. Recognizing these common problems is the first step towards effectively troubleshooting and maintaining your Keurig 2.0 brewer for a consistent brewing experience. Regular cleaning and descaling are vital to prevent these issues.
Keurig 2.0 Won’t Power On
If your Keurig 2.0 fails to power on, several factors could be at play. Begin by verifying the power source. Ensure the brewer is properly plugged into a functioning electrical outlet. If connected to a surge protector, confirm that the surge protector is not tripped or faulty. Try plugging the Keurig directly into the wall to eliminate the surge protector as the problem.
Next, check the power cord for any visible damage, such as cuts or fraying. If damage is present, the cord may need replacement. Power surges can sometimes trip the internal circuit of the Keurig. To address this, unplug the brewer for at least five minutes to allow the control board to reset.
If the Keurig still doesn’t power on after these steps, there may be an issue with the internal electronic control board. In some cases, a complete reboot of the control board is necessary. If all troubleshooting steps fail, contacting Keurig customer support for further assistance or potential repair options may be required. A qualified technician can diagnose and resolve more complex electrical issues.
Keurig 2.0 Not Brewing
When your Keurig 2.0 refuses to brew, several common culprits may be responsible. Start by ensuring the water reservoir is properly filled and correctly seated in its base. A misaligned reservoir can prevent the brewer from recognizing the water level. Next, confirm that a compatible K-Cup pod is correctly inserted into the K-Cup holder. The Keurig 2.0 series utilizes a sensor system to read specific K-Cup types, so using an unauthorized pod can halt the brewing process.
Air bubbles or debris obstructing the internal tubing can also lead to brewing issues. Try running several brewing cycles without a K-Cup to clear any potential blockages. Descaling the Keurig is another crucial step, as mineral buildup can severely impact its performance. Use a descaling solution or white vinegar to remove mineral deposits from the water lines.
Clogged entrance or exit needles are common causes of brewing failure. Carefully clean both needles using a paperclip or the Keurig needle cleaning tool to remove coffee grounds or debris. If the problem persists, consider performing a “spanking” method. Unplug the Keurig, remove the water reservoir, turn the machine upside down over the sink, and gently tap the bottom several times. This can dislodge stubborn blockages.
Water Pressure Issues in Keurig 2.0
Experiencing water pressure problems with your Keurig 2.0 can be frustrating, often manifesting as weak or sputtering brew cycles, or even complete brewing failure. One common cause is mineral buildup within the machine’s internal components. Over time, minerals from your water supply can accumulate, restricting water flow and reducing pressure; Regular descaling is essential to combat this issue. Use a descaling solution or white vinegar, following the manufacturer’s instructions, to dissolve mineral deposits.
Another potential culprit is a clogged water filter. If your Keurig 2.0 has a water filter, ensure it is properly installed and replace it regularly according to the recommended schedule. A saturated or improperly installed filter can significantly impede water flow.
Airlocks within the system can also lead to pressure problems. Try removing and re-seating the water reservoir to ensure a secure connection. Running a few brew cycles without a K-Cup can help to dislodge any trapped air bubbles. Inspect the water intake area for any visible obstructions or debris that may be hindering water flow.
In some cases, the issue may stem from a malfunctioning pump. If you’ve exhausted all other troubleshooting steps and the water pressure remains consistently low, it may be necessary to contact Keurig customer support for further assistance or consider replacing the pump.
Keurig 2.0 Leaking Water
Water leaks in a Keurig 2.0 can stem from various sources, often indicating a simple fix. One common cause is an improperly seated or damaged water reservoir. Ensure the reservoir is correctly positioned and securely attached to the base. Inspect it for cracks or damage that may cause leakage.
The K-Cup holder and surrounding area are also frequent culprits. After brewing, check for grounds or debris obstructing the K-Cup holder or the exit needles. These obstructions can prevent a tight seal, leading to water leakage during the brewing process. Thoroughly clean the K-Cup holder and needles, including the small tray underneath, to remove any buildup.
Another potential source of leaks is the internal tubing and connectors. Over time, these components can become loose or cracked, resulting in slow drips or more significant leaks. Inspect the external housing for any signs of water damage or corrosion, which may indicate an internal leak.
If the leaking persists, descale your Keurig 2.0, as mineral buildup can affect the sealing of internal components. In more severe cases, internal components, such as the water pump or valves, may be faulty and require professional repair or replacement. Always disconnect the Keurig from the power source before attempting any internal inspection or repairs.
Keurig 2.0 Won’t Read K-Cups
A Keurig 2.0 brewer’s inability to read K-Cups can be a frustrating issue, often stemming from the machine’s optical sensor system. The Keurig 2.0 models employ this system to verify the K-Cup’s compatibility, preventing the use of unauthorized pods. If the sensor is dirty, damaged, or malfunctioning, it may fail to recognize even genuine K-Cups.
Start by inspecting the sensor lens, usually located inside the K-Cup holder. Gently clean it with a soft, dry cloth to remove any coffee grounds, dust, or residue that might be obstructing its view. Avoid using abrasive cleaners or excessive moisture, as these could damage the sensor.
Ensure that you’re using K-Cups that are compatible with the Keurig 2.0 system. Some older or non-licensed K-Cups may not have the correct markings for the sensor to read. If you’re using refillable K-Cups, make sure they’re properly filled and sealed.
Sometimes, a simple reboot can resolve the issue. Unplug the Keurig from the power outlet for several minutes, then plug it back in. This can reset the internal electronics and potentially clear any temporary glitches affecting the sensor.
If the problem persists, the sensor itself may be faulty and require replacement. This is usually a more complex repair, and contacting Keurig customer support or a qualified appliance technician is recommended. They can diagnose the issue accurately and advise on the best course of action.
Cleaning and Maintenance

Regular cleaning and maintenance are crucial for prolonging the life and ensuring the optimal performance of your Keurig 2.0 coffee brewer. Consistent upkeep prevents mineral buildup, removes coffee residue, and helps avoid common issues like leaks or brewing malfunctions. Establishing a cleaning routine will not only improve the taste of your coffee but also safeguard your investment.
Start by regularly cleaning the exterior of the Keurig 2.0 with a damp cloth to remove any spills or stains. The drip tray and water reservoir should be washed weekly with warm, soapy water. Rinse thoroughly to remove any soap residue before reassembling.
Pay attention to the K-Cup holder, which can accumulate coffee grounds and oils. Remove the holder and wash it regularly. Also, clean the entrance and exit needles, as clogs here can affect brewing pressure and coffee flow. Use a paperclip or the Keurig cleaning tool to gently dislodge any buildup.
Descaling is another essential part of maintenance. Mineral deposits from water can accumulate over time, affecting the brewer’s heating efficiency and potentially causing damage. Descale your Keurig every 3-6 months, or more frequently if you use hard water. Use a descaling solution or white vinegar, following the instructions in the descaling section.
By incorporating these cleaning and maintenance steps into your routine, you can ensure your Keurig 2.0 continues to brew delicious coffee for years to come.
Descaling Your Keurig 2.0
Descaling is a vital maintenance process for your Keurig 2.0, as it removes mineral deposits that accumulate over time from water usage. These mineral deposits, primarily calcium and lime, can significantly impact the brewer’s performance, causing slower brewing times, reduced heating efficiency, and even potential damage to internal components. Regular descaling ensures optimal functionality and extends the lifespan of your Keurig 2.0.
The frequency of descaling depends on the hardness of your water. If you have hard water, descaling every 3 months is recommended. For softer water, descaling every 6 months may suffice. Keurig also advises descaling if you notice slower brewing or unusual noises during operation.
To descale your Keurig 2.0, you can use either the Keurig Descaling Solution or white vinegar. Begin by emptying the water reservoir and removing the water filter, if applicable. Fill the reservoir with the descaling solution or a 1:1 mixture of white vinegar and water.
Run a full brewing cycle without a K-Cup. Repeat this process until the reservoir is empty. After descaling, rinse the reservoir thoroughly with fresh water. Then, fill the reservoir with fresh water and run at least two more brewing cycles to ensure all traces of the descaling solution or vinegar are removed. This step is crucial to prevent any lingering taste in your coffee.
Following these steps will effectively descale your Keurig 2.0, maintaining its performance and prolonging its life.
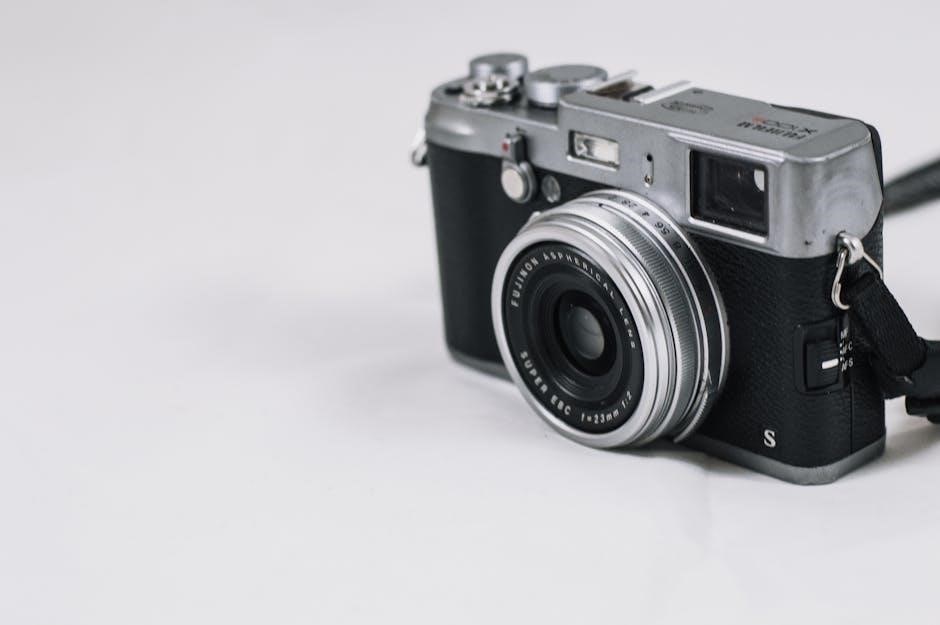
Cleaning the Needles (Entrance and Exit)
Maintaining clean needles, both the entrance and exit needles, is crucial for optimal performance and consistent brewing with your Keurig 2.0. These needles are responsible for piercing the K-Cup and dispensing water, and they can easily become clogged with coffee grounds and other debris. Clogged needles can lead to weak or incomplete brews, inconsistent flavor, and even prevent the machine from brewing altogether.
Regular cleaning of the needles is recommended to prevent these issues. Keurig suggests cleaning them at least once a month, or more frequently if you notice any signs of clogging.
To clean the entrance needle, first, lift the handle to open the K-Cup holder. Carefully remove the K-Cup holder assembly. You may need to use a small tool, such as a paperclip or the Keurig needle cleaning tool (if you have a Plus Series brewer), to dislodge any stubborn grounds.
Next, locate the entrance needle on the underside of the brewer head. Gently insert the cleaning tool or straightened paperclip into the needle opening to dislodge any accumulated debris. Wiggle the tool around to ensure you clear any blockage.
For the exit needle, pull up the lever of the pod holder to reveal the needle. Carefully use the cleaning tool or paperclip to clear any coffee grounds or debris from the needle opening.
After cleaning both needles, rinse the K-Cup holder assembly thoroughly with water. Reassemble the K-Cup holder and run a test brew with just water to flush out any remaining debris.
Cleaning the K-Cup Holder
The K-Cup holder is a crucial component of your Keurig 2.0, responsible for securely holding the K-Cup during the brewing process. Over time, coffee grounds, oils, and other residue can accumulate in the K-Cup holder, affecting the taste of your coffee and potentially causing malfunctions. Regular cleaning of the K-Cup holder is essential to maintain optimal performance and prevent these issues.
To clean the K-Cup holder, start by turning off and unplugging your Keurig 2.0. Allow the machine to cool down completely before proceeding. Lift the handle to open the K-Cup holder compartment and carefully remove the K-Cup holder assembly. This assembly typically consists of several removable parts, including the holder itself and the surrounding components.
Disassemble the K-Cup holder into its individual parts. Wash each part thoroughly with warm, soapy water. Use a soft brush or sponge to remove any stubborn coffee grounds or residue. Pay close attention to the areas where the K-Cup makes contact with the holder, as these areas are prone to buildup. Rinse all parts thoroughly with clean water to remove any soap residue.
Once the parts are clean and dry, reassemble the K-Cup holder. Ensure that all parts are properly aligned and securely connected. Reinstall the K-Cup holder assembly back into the Keurig 2.0. Run a test brew cycle with just water to ensure that the K-Cup holder is functioning properly and to flush out any remaining debris.
Resetting Your Keurig 2.0

Sometimes, your Keurig 2.0 might encounter issues that require a reset to resolve. Resetting can help clear error messages, resolve brewing problems, or restore the machine to its default settings. Unlike some appliances, the Keurig 2.0 doesn’t have a dedicated reset button, so the process involves a power cycle.
To perform a basic reset, start by unplugging your Keurig 2.0 from the power outlet. It’s crucial to leave it unplugged for at least five minutes. This allows the internal memory chip to fully discharge and reboot, effectively clearing any temporary glitches or errors. Waiting less than five minutes might not be sufficient for a complete reset.
After the waiting period, plug the Keurig 2.0 back into the power outlet. Ensure the outlet is functioning correctly. If the machine is plugged into a surge protector, verify that the surge protector is also working and not tripped. Power on the Keurig 2.0. The machine should go through its initialization process. If the reset was successful, any previous error messages should be cleared, and the machine should be ready for brewing.
If the basic reset doesn’t resolve the issue, you can try a more thorough reset by removing the water reservoir before unplugging the machine. After the five-minute wait, reattach the reservoir, plug the machine back in, and power it on. This can sometimes help clear more persistent errors.

Contacting Keurig Customer Support
Addressing Power Surges and Electrical Issues
Power surges and electrical issues can significantly impact the performance and lifespan of your Keurig 2.0. These events can range from minor voltage fluctuations to severe spikes that damage the internal components. It’s crucial to take preventative measures and understand how to troubleshoot electrical problems to protect your Keurig 2.0.
The first line of defense against power surges is using a surge protector. Plug your Keurig 2.0 into a high-quality surge protector to shield it from unexpected voltage spikes. Check the surge protector regularly to ensure it’s functioning correctly. Some surge protectors have indicator lights or reset buttons that can alert you to a tripped circuit.
If you suspect a power surge has already occurred, check the outlet where the Keurig 2.0 is plugged in. Ensure that the outlet is functioning correctly by testing it with another device. If the outlet is dead, check the circuit breaker or fuse box to see if a circuit has tripped. Reset the breaker or replace the fuse if necessary.
If the Keurig 2.0 won’t power on after a suspected power surge, even with a functioning outlet, it might indicate internal damage. In such cases, try the reset procedure. Unplug the machine for at least five minutes and then plug it back in. If it still doesn’t power on, it might require professional repair or replacement.